How Can You Create a More Comfortable Outdoor Living Area?
1 September 2026
I once visited a home with a generous backyard, a new dining set and a beautiful garden, yet nobody stayed outside for long. By midday, the table was in full sun. A light shower sent everyone indoors, and the evening breeze made the open patio feel exposed. The space had all the furniture of an outdoor room but none of the comfort.
A successful outdoor living area should provide shelter, airflow, privacy and easy access to the home. It should feel inviting during an ordinary weekday, not only when the weather behaves perfectly. By planning the structure, orientation, flooring, lighting and furnishings together, homeowners can create an area that supports year-round relaxation and entertaining.

Start with How You Want to Use the Space
The right design begins with daily activities rather than a catalogue image. A quiet reading area needs different dimensions and lighting from a large dining zone, outdoor kitchen or family play space.
Think about who will use the area and when. Morning coffee may need protection from low eastern sun, while afternoon entertaining may call for stronger western shading. Families with children or pets also need durable surfaces and clear sightlines.
Write down the main priorities:
- Outdoor dining
- Cooking and food preparation
- Casual seating
- Children’s play
- Pet-friendly space
- Poolside relaxation
- Work or study
- Garden views
- Evening entertaining
- Storage
Choose one main purpose and one or two supporting uses. Trying to fit every activity into a small area can produce cramped furniture layouts and narrow walkways.
Measure tables and seating while chairs are pulled out, not only when they are tucked away. Allow comfortable movement between the house, garden, cooking area and doors.
Observe Sun, Wind and Rain Before Designing
Weather reaches every property differently. The direction of the house, nearby buildings, trees and local terrain all influence shade, airflow and wind exposure.
Observe the proposed area throughout the day. Note when the sun crosses windows, where rain enters and which direction strong winds arrive from. A design based on these patterns will usually feel better than one positioned only for symmetry.
Record details such as:
- Morning and afternoon sun
- Seasonal shade changes
- Prevailing wind direction
- Wind tunnels between buildings
- Areas where rainwater pools
- Water flowing from downpipes
- Existing trees and garden shade
- Reflected heat from walls or paving
- Views worth preserving
- Neighbouring sightlines
A western-facing area may require strong afternoon shading and surfaces that do not retain excessive heat. A sheltered courtyard may need more attention to ventilation so cooking heat and warm air can escape.
Take photos at different times of day. These images can help a designer or installer understand conditions that may not be visible during a single site visit.

Can Pergola Kits Create a More Usable Outdoor Room?
Pergola kits can provide a defined structure over patios, decks and garden areas. They can frame the outdoor room, support shade and create a visual connection between the house and landscape.
Kit-based systems may also simplify product selection because key components are designed to work together. The right option still depends on site dimensions, building structure, wind exposure, drainage and the required approvals.
Before selecting a kit, review:
- Available width, length and height
- Wall-mounted or freestanding configuration
- Post positions
- Roof type
- Drainage and guttering
- Material and finish
- Wind and weather exposure
- Installation method
- Existing foundations
- Warranty and maintenance
- Planning or building requirements
- Access for delivery and installation
Do not assume a standard size will fit neatly between doors, windows and boundary lines. Small dimensional differences can affect posts, roof falls, furniture placement and access.
A site-specific review can confirm whether the structure suits the property and how it will connect with existing walls, paving or footings. Structural and approval requirements should be checked before ordering or starting work.
Use an Adjustable Roof for Greater Weather Control
A fixed roof provides dependable cover but may reduce daylight entering nearby rooms. An open structure admits more light yet offers limited protection from rain and intense sun.
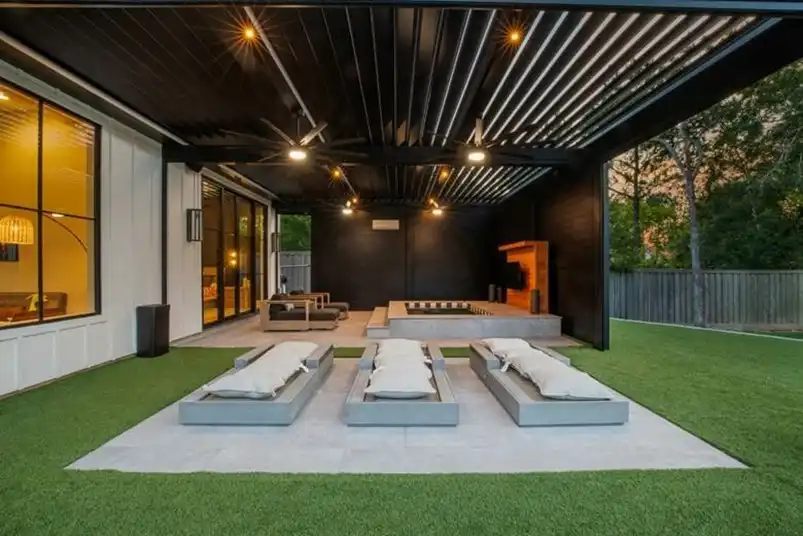
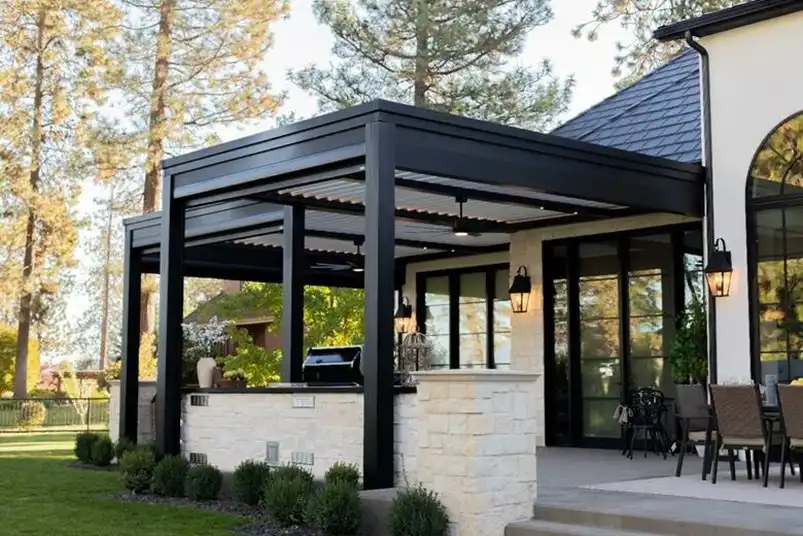
A louvered roof pergola can provide adjustable control by allowing the roof blades to change position. The louvres may open for sunlight and ventilation, tilt for shade or close when weather protection is needed.
This flexibility can help homeowners respond to changing conditions throughout the day. Morning light can enter while the air is cool, then the blades can be adjusted as the sun becomes stronger.
When reviewing an adjustable system, ask about:
- Louvre operation
- Manual or motorised controls
- Rain management
- Gutter and downpipe locations
- Wind and weather limits
- Electrical requirements
- Maintenance access
- Available colours
- Sensor options
- Warranty coverage
A closed louvred roof still needs a planned path for water. Integrated drainage should carry rain away from seating areas, doorways and foundations.
The structure’s position can also affect indoor daylight. Discuss how the roof will interact with nearby windows so the outdoor area gains shelter without making adjoining rooms unnecessarily dark.
Plan the Structure Around the House
An outdoor structure should feel connected to the architecture rather than placed beside it as an afterthought. Rooflines, window heads, doors, gutters and exterior colours all influence the finished appearance.
A wall-mounted system may create a direct link from an indoor living area, while a freestanding structure can establish a separate garden destination. Each option has different structural, drainage and circulation needs.
Review the following relationships:
- Door opening direction
- Window positions
- Existing roof and gutters
- Outdoor taps and power
- Air-conditioning units
- Boundary setbacks
- Pool fences
- Garden beds
- Underground services
- Views from inside the home
Post locations should not interrupt common walking paths or block the view from important windows. They also need suitable support below ground or through existing surfaces.
Colour selection can help the structure blend with window frames, roofing or fascia. A contrasting finish may work well, but it should connect with another permanent element of the property.
Select Comfortable Flooring
Flooring affects heat, drainage, cleaning and how easily furniture can be moved. The surface should suit the area’s exposure and the people using it.
Large-format pavers can create a clean appearance, while decking may offer a warmer texture underfoot. Concrete can be practical and versatile when finished with attention to drainage and slip resistance.
Compare surfaces based on:
- Heat in direct sunlight
- Slip resistance when wet
- Drainage
- Cleaning requirements
- Resistance to stains
- Suitability for furniture
- Movement around pools or steps
- Maintenance
- Visual connection with indoor flooring
Very dark surfaces can absorb heat, while glossy finishes may become slippery after rain. Uneven paving can make chairs unstable and create trip points.
The finished level should work with doors, garden paths and drainage outlets. Water must move away from the house rather than collecting near thresholds.
Create Shade Without Blocking Every Ray of Light
Comfortable shade is rarely about making the area permanently dark. The goal is to reduce glare and heat while retaining enough natural light for the outdoor room and the home beside it.
Roof structures, screens, outdoor blinds, planting and movable umbrellas can work together. Layered shade provides more flexibility than relying on one element.
Useful combinations include:
- Overhead roof with side screening
- Pergola with deciduous planting
- Adjustable roof with outdoor blinds
- Fixed cover with open garden edges
- Tree shade with a sheltered dining zone
- Roof structure with movable umbrellas
Low-angle morning or afternoon sun often enters beneath a roof. Side screens can address this exposure while also adding privacy and reducing wind.
Avoid blocking all airflow with solid barriers. Openable screens or spaced planting may soften wind without turning the area into a warm, enclosed box.
Add Lighting for Safety and Atmosphere
Lighting extends the usable hours of an outdoor area. It should make steps, pathways and cooking zones visible while creating a relaxed atmosphere around seating.
One bright floodlight can flatten the space and cause glare. Several softer sources at different heights usually produce a more welcoming result.
An outdoor lighting plan may include:
- General overhead lighting
- Task lighting near cooking surfaces
- Wall lights around doors
- Step and path lighting
- Accent lighting for planting
- Low-level lighting near seating
- Dimmable fittings
- Sensors for access routes
Outdoor electrical work and fixed fittings should be completed by appropriately licensed professionals. Products must suit their exposure to moisture, dust and weather.
Keep bright fittings away from eye level and neighbouring windows. Warm-toned lighting often works well in dining and relaxation areas, while clearer task light may suit food preparation.
Improve Privacy Without Creating a Closed Box
Privacy can make an outdoor area feel calmer, especially where neighbouring homes overlook the yard. Full-height solid walls are not always necessary and may reduce light and airflow.
Slatted screens, planting, outdoor curtains and partial walls can block direct views while keeping the space open. The right solution depends on the viewing angle rather than simply the boundary location.
Possible privacy features include:
- Vertical timber or aluminium battens
- Climbing plants on screens
- Tall planters
- Adjustable outdoor blinds
- Layered shrubs
- Decorative panels
- Partial masonry walls
Sit in the proposed seating position and identify the actual lines of sight. A screen placed close to the seating area may block a view more effectively than a taller structure on the boundary.
Planting takes time to mature, so a combination of structural screening and greenery can provide immediate privacy with a softer long-term appearance.
Choose Furniture for Real Outdoor Conditions
Outdoor furniture needs to suit the scale, exposure and maintenance expectations of the household. A deep lounge may look inviting but overwhelm a narrow patio, while a large dining table may leave too little room for chairs and circulation.
Measure the complete furniture footprint before buying. Include space for people to sit, stand and walk around each piece.
Prioritise:
- Weather-resistant frames
- Quick-drying cushions
- Washable covers
- Comfortable seat heights
- Stable tables
- Storage for soft furnishings
- Materials suitable for coastal or exposed locations
- Flexible pieces that can be rearranged
Use rugs, cushions and planters to soften hard surfaces, but avoid filling every corner. Open floor space helps the area feel larger and makes cleaning easier.
A storage bench can provide seating and protect smaller items, though cushions may still need dry indoor storage during prolonged wet weather.
Make Heating and Cooling Practical
Fans, heaters and airflow controls can extend the seasonal use of an outdoor room. Their effectiveness depends on ceiling height, enclosure and exposure.
A ceiling fan can move warm air across a covered area, while radiant heating may provide targeted warmth to seated people. Open, windy spaces may lose heat quickly, making some heating methods less effective.
Comfort measures may include:
- Ceiling fans
- Portable or fixed radiant heaters
- Adjustable side screens
- Shade planting
- Light-coloured roofing
- Cross-ventilation
- Cushions and throws
- Flexible furniture positions
Heating equipment requires safe clearances and appropriate installation. Keep combustible furnishings away from heat sources and follow the product requirements.
Designing for passive comfort should come before adding equipment. Shade, roof control and airflow can reduce reliance on powered cooling and heating.
Include an Outdoor Kitchen Carefully
An outdoor kitchen can make entertaining easier by keeping food preparation close to guests. It also introduces heat, smoke, grease, water, gas and electrical requirements that need coordinated planning.
Place cooking equipment where smoke can disperse without entering the house or gathering beneath the roof. Allow practical bench space and a clear route between cooking and dining zones.
Plan for:
- Appliance clearances
- Ventilation
- Weather protection
- Non-combustible surfaces
- Task lighting
- Power and water
- Gas installation where applicable
- Waste storage
- Easy-clean finishes
- Safe movement around hot equipment
Keep the cook connected to the seating area without placing guests in the path between the kitchen and table. Children’s play routes should also remain away from hot surfaces.
Use qualified trades for electrical, plumbing and gas work. Coordinating these services before flooring and cabinetry are finished can reduce later disruption.
Build Low-Maintenance Comfort into the Design
An outdoor area is more likely to be used when it is easy to clean and maintain. Materials should suit local exposure, including strong sun, rain, wind and coastal air where relevant.
Simplify maintenance with:
- Accessible gutters and drainage outlets
- Washable surfaces
- Removable cushion covers
- Durable powder-coated finishes
- Sealed or naturally resistant flooring
- Concealed but accessible services
- Storage near the seating area
- Planting suited to the conditions
Leaves and debris will still collect around roof structures, furniture and drains. Easy access can turn a difficult seasonal job into a short routine.
Ask suppliers for written maintenance instructions. Using unsuitable cleaners or failing to clear drainage points may affect appearance and product performance.
Bring the Whole Outdoor Room Together
A comfortable outdoor living area combines shelter, airflow, shade, drainage, lighting and furniture in one coordinated plan. No single feature can correct every problem if the structure faces the wrong direction or the layout restricts movement.
Begin by recording how sunlight, rain and wind affect the site. Define the main activity, measure furniture and review how the area connects with doors, windows and the garden.
When a roofed structure forms part of the plan, compare fixed and adjustable options against your climate, budget and daily routine. Speak with an experienced provider about site dimensions, installation, drainage and approvals so the finished area feels like a natural extension of your home. Combining structures, lighting, landscaping and automated controls with modern outdoor features can make the backyard more practical throughout the day and evening.
Frequently Asked Questions About Pergola Kits
What is included with pergola kits?
The contents vary between manufacturers and models. A kit may include posts, beams, roof components, brackets, fasteners and installation instructions, while footings, drainage parts or specialised fixings may be separate.
Review the complete component list before ordering. Ask whether delivery, installation, gutters, downpipes, electrical controls and site-specific engineering are included. Clear documentation makes it easier to compare packages and identify additional costs before work starts.
Can pergola kits be installed on an existing patio?
Some pergola kits can be installed over an existing patio, but the paving or slab must be reviewed for suitable support and fixing. A decorative surface alone may not provide the foundation required for structural posts.
Existing levels, drainage, underground services and door clearances also affect installation. A site inspection can identify whether new footings, altered post positions or drainage work are required before the structure is ordered.
Do pergola kits require council approval?
Approval requirements depend on the location, size, height, attachment method, boundary position and local planning rules. Some projects may qualify for simplified pathways, while others need formal approval.
Check the requirements that apply to your property before purchasing or installing a kit. Strata or community properties may also require written approval from the relevant owners corporation or association. Product suitability does not automatically mean the proposed structure is approved for the site.
Are pergola kits suitable for coastal properties?
A pergola kit may suit a coastal property when its materials, coatings, fasteners and maintenance requirements match the level of salt and weather exposure. Coastal air can accelerate corrosion on unsuitable components.
Ask the supplier which exposure conditions the system is designed for and how often it should be cleaned. Product warranties may contain location-specific maintenance requirements. Regular removal of salt residue can help protect finishes and moving parts.
How do I choose the right size pergola kit?
Start with the usable floor area, furniture dimensions and walking space rather than choosing the largest structure that fits the yard. Include room for chairs to move and for people to pass between doors, seating and garden paths.
Post locations, roof overhangs, windows, gutters and boundaries also affect the suitable size. Marking the proposed footprint on the ground can help you experience the scale before placing an order.
Comments on this help guide to How to make comfortable outdoor living area for home outdoor living article are welcome.
Property Design
Contemporary Property Designs – recent architectural selection:
++
House Pergolas
House Awning Designs & Pergolas
Azenco Outdoor Motorized and Manual Pergola
How to enjoy your terrace in autumn with a well-installed awning
Review: SunSetter Awnings, curtains guide
Comments / photos for the How to make comfortable outdoor living area – home garden pergola page welcome.