
Expert Tips for Achieving a Flawless Finish with Wall Putty
post updated 21 February 2026

16 December 2025
DIY Perfection: Expert Tips for Achieving a Flawless Finish with Wall Putty
Meet Rohan, a man for whom, like many in his middle-class family, his home is his pride. It’s a testament to years of saving, planning, and dreaming. His family moved into their modest three-bedroom apartment a decade ago, and over the years, the walls had begun to tell a story they weren’t too happy about. They were a canvas of hairline cracks, faint damp patches, and a general greyish tinge that no amount of repainting could permanently fix. The paint was flaking, especially in the bathroom-adjacent wall, and it felt like they were constant, losing battle against the elements.
He dreaded the cost of professional repair. The quotes were daunting. But watching his mother sigh at the discoloured wall behind their family photo gallery sparked determination in him. If the experts were too expensive, he would become the expert. And so began his deep dive into the world of wall putty.
His initial research was overwhelming. There were so many brands, so many claims. He needed something affordable, effective, and something a first-timer could use without creating a bigger mess. He spent evenings reading product reviews and watching tutorial videos on how to apply wall putty. The common thread in all the positive experiences was the importance of a good base. It wasn’t just about slapping on a filler; it was about creating a strong, smooth canvas for the paint. That’s when he discovered Birla White Wallseal Waterproof Putty.
The promise of a waterproof putty for wall issues was the clincher. His main problems were dampness and flaking, and the description of its “Extra HP polymers” that keep moisture away sounded like exactly what was needed. He picked up a bag from a local hardware store, feeling a mix of excitement and nervousness. This was his chance to restore his home’s beauty with his own hands.
The Transformation Begins: A Hands-On Journey
The journey from their cracked, dull walls to the smooth, bright canvas they have now was methodical and, to his surprise, deeply satisfying. The instructions on the bag were clear, but having done his homework, he understood the nuances. Here’s how his DIY project unfolded, a process that can help anyone.
- The Blank Canvas: Surface Preparation
The old, flaking paint had to go. He armed himself with a wire brush and sandpaper and spent a full weekend meticulously scraping and standing the walls. It was dusty, tedious work, but crucial. The goal is a surface completely free of dust, grease, and loose material. He then moistened the walls thoroughly with a clean cloth and water. He learned a cardinal rule: never apply wall putty on a dry surface.
- The Art of the Mix
This is where many go wrong. He poured the required amount of clean water into a large bucket and slowly added the wall putty powder into it, never the other way around. He used a mechanical mixer attachment on a drill small investment that paid off immensely. He mixed for a good 15 minutes until the paste was utterly smooth and lump-free, with a consistency like whipped cream. The fragrance of the sandalwood variant he’d chosen made the process pleasant, a small but wonderful touch. He remembered to only mix what he could use in about three hours.
- The Application: Patience is Key
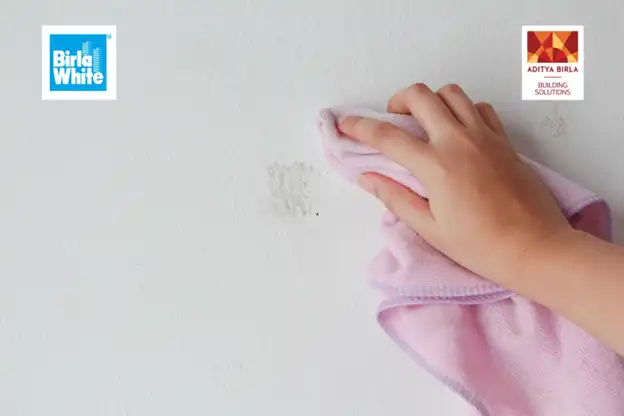
With the paste ready, he applied the first coat with a stainless-steel putty knife. Working in upward strokes on the moistened wall, he focused on laying down a thin, even layer. The putty walls began to take shape, hiding the imperfections beneath a clean, white coat. After letting it dry for a few hours, he gently rubbed the surface with a damp sponge to remove any loose particles—a step that ensures a perfectly smooth base for the next coat.
He repeated the process for the second coat, this time focusing on achieving a flawless, level surface. He then did the hardest part: he left it alone to dry overnight. The next morning, he was greeted by walls that were smoother and brighter than they had been since the day they moved in. The true test was the waterproof putty for wall claim. The faint damp patches that had haunted the living room were completely sealed, with no sign of moisture.
The final step was painting. And here’s the magic a good wall putty does: the paint glided on. The coverage was so much better, and the true, vibrant tone of the colour shone through, unlike before when the dull, uneven base would mute it. They used significantly less paint, which meant the wall putty had already started paying for itself.
The transformation was more than just aesthetic. There was a new sense of pride in their home. His mother’s smile was the ultimate reward. The putty walls were not just a surface; they were a symbol of what they could achieve with a little effort and the right product.
For anyone looking to undertake a similar journey, the advice from his experience is this: don’t fear the process. Understanding how to apply wall putty is half the battle won. Choosing a high-quality product that offers water-resistance and strong adhesion is key. A home is a sanctuary. With a little DIY spirit, anyone can protect its beauty and ensure those putty walls remain a source of joy for years to come. For more details, visit the Birla White website and find the right solution for your walls.
Comments on this guide to Flawless finish with wall putty tips article are welcome.
Commercial Real Estate Design
Recent related architecture articles on e-architect:
Next generation of knowledge work, hybrid workplaces
The fluid, sustainable future of retail
Data-Informed Design for User Experience at Work
++
Architecture Design
Comments / photos for the Flawless finish with wall putty advice architectural article page welcome.


